
The Ultimate Build and Kill Zombies Wave Survival Guide: Master Your Defense
Struggling to reach new distances? Our comprehensive Build and Kill Zombies wave survival guide helps you balance damage and defense for high scores.
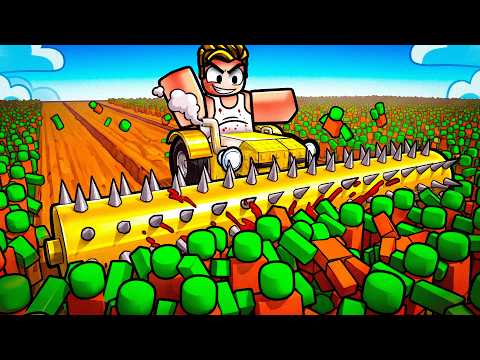 Official mediaStruggling to reach new distances? Our comprehensive Build and Kill Zombies wave survival guide helps you balance damage and defense for high scores.YouTube
 Mastering the Waves: A Strategic Approach
If you have ever found your car reduced to scrap metal just as a wave reaches its peak, you know exactly why mastering the mechanics is essential. This build and kill zombies wave survival guide is designed to help you transform your vehicle from a fragile target into an unstoppable engine of destruction. By understanding how to balance your offensive output against defensive durability, you can push your record distance further than ever before. Every successful run starts with the right mindset, and this build and kill zombies wave survival guide provides the framework you need to climb the leaderboards.
The Core Philosophy: Balance is Everything
The most common trap for new players is focusing exclusively on one aspect of their build. While high damage numbers look impressive, a car that cannot survive a single hit will never reach the later, more lucrative waves. Conversely, a heavily armored vehicle that lacks the firepower to clear enemies quickly will eventually be overwhelmed by sheer numbers.
The Balance Tier List
To help you visualize the necessary trade-offs, we have categorized the primary build paths based on community reports.
| Build Style | Primary Focus | Survivability | Clear Speed | Recommended For |
|---|---|---|---|---|
| Glass Cannon | High Damage | Low | Very High | Speed-running, Early Waves |
| Balanced | Hybrid | Medium | Medium | General Progression |
| Tank | High Defense | Very High | Low | Farming, Late Game Stability |
Step-by-Step Execution for Every Run
Consistency is the hallmark of a top-tier player. According to community reports, following a rigid, repeatable process during your sessions significantly improves your average distance.
- Initial Deployment: Enter the zone with a mix of damage and at least one dedicated defensive piece.
- The Clean-Up Phase: Ensure every single zombie is cleared before moving to the next area. Leaving stragglers behind creates unnecessary risk and drains resources.
- Pacing Upgrades: Once a wave is cleared comfortably, prioritize damage upgrades to keep your kill speed competitive with the incoming difficulty spikes.
- Reinforcement: As soon as you notice zombies starting to penetrate your layout, immediately pivot to adding a second defensive component.
- The Final Push: Only attempt to break your distance records once your clear speed is high enough that you aren't struggling to survive the standard mob density.
Troubleshooting Your Build
Even the best players hit a wall eventually. If you find yourself repeatedly failing at the same wave, it is time to reassess your strategy.
Common Failure Points
| Symptom | Likely Cause | Suggested Fix |
|---|---|---|
| Overwhelmed Mid-Wave | Poor Funneling | Reconfigure defenses to force enemies into a single kill zone. |
| No Income Generated | Low Damage | Swap one defensive piece for a high-output weapon. |
| Dying at the Same Point | "Balance Wall" | Strip the car and rebuild with straight walls and centralized firepower. |
| Stalled Progression | Overextending | Farm the previous, easier band to accumulate more cash for upgrades. |
Designing Your Defensive Layout
Player experience suggests that the physical shape of your car matters just as much as the parts you install. If your weapons have to cover too many angles at once, your damage output is effectively diluted.
By using walls to funnel zombies into a narrow "kill zone," you can concentrate all your fire in one direction. This strategy allows you to maximize your DPS (Damage Per Second) while keeping your most vulnerable components shielded from the swarm. If you feel like your weapons are firing into thin air, it is time to tighten your geometry and create a more efficient defensive perimeter.
Avoiding Rookie Mistakes
Many players fall into the trap of "chasing the record" every single time they play. While ambition is good, it is often detrimental to progress. If you are constantly dying in the late stages, you are likely not farming enough cash in the earlier, safer waves.
Additionally, remember that survival alone is not a metric of success. If you are surviving for twenty minutes but earning zero cash because your weapons are too weak to clear the zombies, you are effectively standing still. Focus on the official game page for the latest patch notes and balance adjustments, as developer updates can occasionally change which parts are considered "meta."
Strategic Resource Allocation
Managing your cash flow is critical to long-term success. You should never spend all your earnings on a single, expensive upgrade if it leaves your defense vulnerable. Use the following priority list to guide your spending:
| Priority | Upgrade Type | Purpose |
|---|---|---|
| 1 | Sustained DPS | Ensures you can clear waves before they overwhelm you. |
| 2 | Core Armor | Provides the buffer needed to survive accidental hits. |
| 3 | Utility/Speed | Helps in repositioning or clearing stragglers. |
| 4 | Cosmetic/Luxury | Save these for when you are consistently clearing late-game waves. |
Frequently Asked Questions
How do waves work in the game?
Zombies arrive in waves that increase in difficulty as you progress. Your primary goal is to clear these waves quickly to earn cash, which you then use to upgrade your car’s stats and defenses.
How far can a good build get?
The distance your car can survive depends entirely on your ability to balance damage and survivability. Players who prioritize a "build and kill zombies wave survival" strategy often reach significantly higher milestones than those who lean too far into just one stat.
Are there checkpoints in the game?
As of today, checkpoints are not confirmed for this title. You should treat every run as a fresh attempt to maximize your distance and income.
What is the best way to handle being overwhelmed?
If you find yourself swarmed, stop pushing forward. Use your defensive parts to funnel the zombies into a smaller area where your weapons can concentrate their fire, and ensure you aren't neglecting your damage upgrades.
Related Guides
Build and Kill Zombies Beginner Guide: How to Construct the Ultimate Undead Smasher
Master the apocalypse with our Build and Kill Zombies beginner guide. Learn about part rarities, skill upgrades, and car construction to survive.
Build and Kill Zombies Tips and Tricks: The Ultimate Guide to Surviving the Horde
Master the art of vehicle construction in Roblox with these Build and Kill Zombies tips and tricks. Learn to roll for parts and maximize your cash flow.
Build and Kill Zombies: How to Play and Survive the Apocalypse in Roblox
Master the undead with our ultimate guide on how to play Build and Kill Zombies. Learn to build your death machine, upgrade weapons, and survive the waves.
Mastering the Build and Kill Zombies Controls: A Complete Beginner’s Guide
Learn everything about the Build and Kill Zombies controls, how to upgrade your vehicle, and tips for dominating the undead in this comprehensive guide.